Saturday, March 19, 2011

Irish Soda Bread by Barefoot Contessa

I'd like to see Ina Garten scrape a piece of dough she describes as "it will be very wet" out of a bowl and onto a cutting board gracefully, quickly, or without standing next to the counter rubbing her hands together like a moron trying to scrape the dough out from between her fingers, because that is exactly what I do every time I make bread.  I love kneading dough, to be sure, I just wish I didn't feel stupid every time I did it.

Time-wasting, mind-numbing dumbness aside, this is a great recipe that I will definitely be making again.  There's one tablespoon of sugar for every cup of flour, but the finished product is sweetened to a heavenly state by fresh orange zest and dried currants.  POW, it's obviously sweet, but the natural, fruity ingredients keep it from tasting sugary.  Heck, you probably don't even need to add as much sugar as was called for in order to get it to taste sweet and delicious.


You're supposed to cut an X into the top of the bread so that heat will get into the middle of the bread and cook it evenly.  I regret not flouring my knife, because my X was a little less pronounced than I should like it to be.  A thin layer underneath the top crust of the loaf took some time longer than the rest of the bread to cook, and it did not look as pretty when it came out, either.

Looks more like an Xbox logo than a loaf of bread.  

vs.

Found

Nevertheless, it still tastes delightful and I eagerly look forward to scarfing down on it with every meal for as long as it lasts!  

Monday, March 14, 2011

Lemon Meringues from Martha Stewart Living

I got my copy of Martha Stewart Living this week, and at the back was a recipe for meringues.  There are only two main ingredients, so that's what I decided to make this week.  For a meringue, one must whisk egg whites to varying degrees of stiffness.  I followed the recipe exactly, and it took me about an hour to whisk them to floppy peaks.  Now, my whisk muscles are a little flabby and Kung Fu Panda was on TV, so that might have distracted me, but why on earth did it take that long to whisk the eggs?  I did some research on egg whites, and this is what I learned:

*  Older eggs take less time for peaks to form than fresh eggs, but they lose their stiffness quickly as well, so don't over whisk them.  My eggs were less than fresh but they were never stiff; they were always a foamy liquid. Thus, I didn't think that that was my problem.

*  If any yolk gets in the egg whites AT ALL, then they just won't get stiff.  The same goes for butter or other oils, they won't let the whites stiffen either.  One source said not to use a plastic bowl because the grease residues are impossible to wash off, which will also prevent stiff eggs.  There was no yolk in my eggs, and I was using a freshly washed glass bowl, so that was not it either.

*  Egg whites get stiffer faster without any other ingredients in them.  If you put sugar in the eggs without peaks already forming, they will still stiffen but it will take much longer.  Ah-ha!  Martha's recipe told me to whisk eggs until foamy (NOT stiff), then add sugar, lemon juice, and a pinch of salt, THEN whisk into stiff peaks.

*  If you live above 3,500 feet and a recipe calls for stiff peaks, go for soft peaks instead.  Dry mountain air sucks the moisture out of food.  I did this, and my meringues came out of the oven nice and crunchy.  After less than 24 hours though, the outsides are a little mushy, so I think I might raise the temperature of the oven next time.  They were in at 200 degrees Fahrenheit for 2 1/2 hours.


I learned a lot about eggs this week, and I hope you don't make the same mistakes I did!  They're not bad meringues, but it could have been a lot easier, and they could have turned out just a smidge better.

Saturday, March 5, 2011

Chocolate Chocolate Chip Cookies from High Altitude Baking by Patricia Kendall

I browsing through my school's library last week and found their cooking section, yay me!  There are a bunch of books about cooking styles from different regions of the world, instructional books, informational books, all kinds of good stuff.  In their collection there was a book about baking at high altitudes by Patricia Kendall, who works with the department of food science at Colorado State University.  There are a lot of tasty recipes that I want to try in this book, so it's a good thing that I have it for a month.  I'm learning all about what to decrease and what to increase and by how much.

Last night I made chocolate chocolate chip cookies.  The dough is really thick, and when you roll them into balls you get chocolate smudges all over your fingers and it makes one feel like a "real" baker.  If you want the nice big round cookies like you get in a lunch line at school or something, I would make the balls really big because they stay pretty tall and don't mush out sideways very much.  Delicious!  I only wish the dry mountain air wouldn't make them crunchy so fast, I have to eat 2 dozen cookies in 2 days.  What a tragedy!

Saturday, February 26, 2011

Mushroom Onion Tartlets

Today I made mushroom onion tartlets, which are basically mini-quiche.  The dough consisted of cream cheese, butter, and flour.  The filling had egg, a small amount of flour, mushrooms, and green onions.  It was very easy.  The recipe is from the instruction manual/recipe book that came with Boyfriend's new stand mixer.  They were a delicious snack/appetizer!

Saturday, February 19, 2011

Banana Pecan Muffins from Baking by Martha Day

Based on past experiences with this cookbook, I decided to modify the recipe for my altitude.  To do this I used slightly less flour and baking powder than the recipe required in order to get the muffins to rise more.  They rose a little, but next time I would use even less baking powder.

One thing I keep messing up: I don't look at the recipe much the day leading up to when I cook it, so I don't notice that the butter should be at room temperature until I'm supposed to cream it with something else.  I should get a butter dish because it doesn't hurt to just leave it out, as long as it's not in the sun.

Concerning bananas:  You get the most banana flavor in your baked good if your bananas are already turning brown, just a little bit past ripe.

So, other than being a little flat on the top, my banana nut muffins are pretty tasty!

Friday, February 11, 2011

Applesauce Biscuits from Baking by Martha Day

This week I made some applesauce biscuits because I love applesauce.  I did not get confused by the measurements this time, but I thought the dough looked a little bit runny when I was dalloping it on the cookie sheet.  Lo and behold, they spread out flat while cooking.  I know it was not because of my oven, I got that fixed.  One thing I can think of is that the applesauce may have been too runny, but it wasn't that bad and I don't think it could have ruined the biscuits so badly.  What I think did it is that the book was written for sea level but I live at about 4,000 feet.  That may not sound like much, but it is a lot when baking.  I'll probably have to modify any recipes I do from that book in the future, especially the cookies and biscuits.

Sunday, February 6, 2011

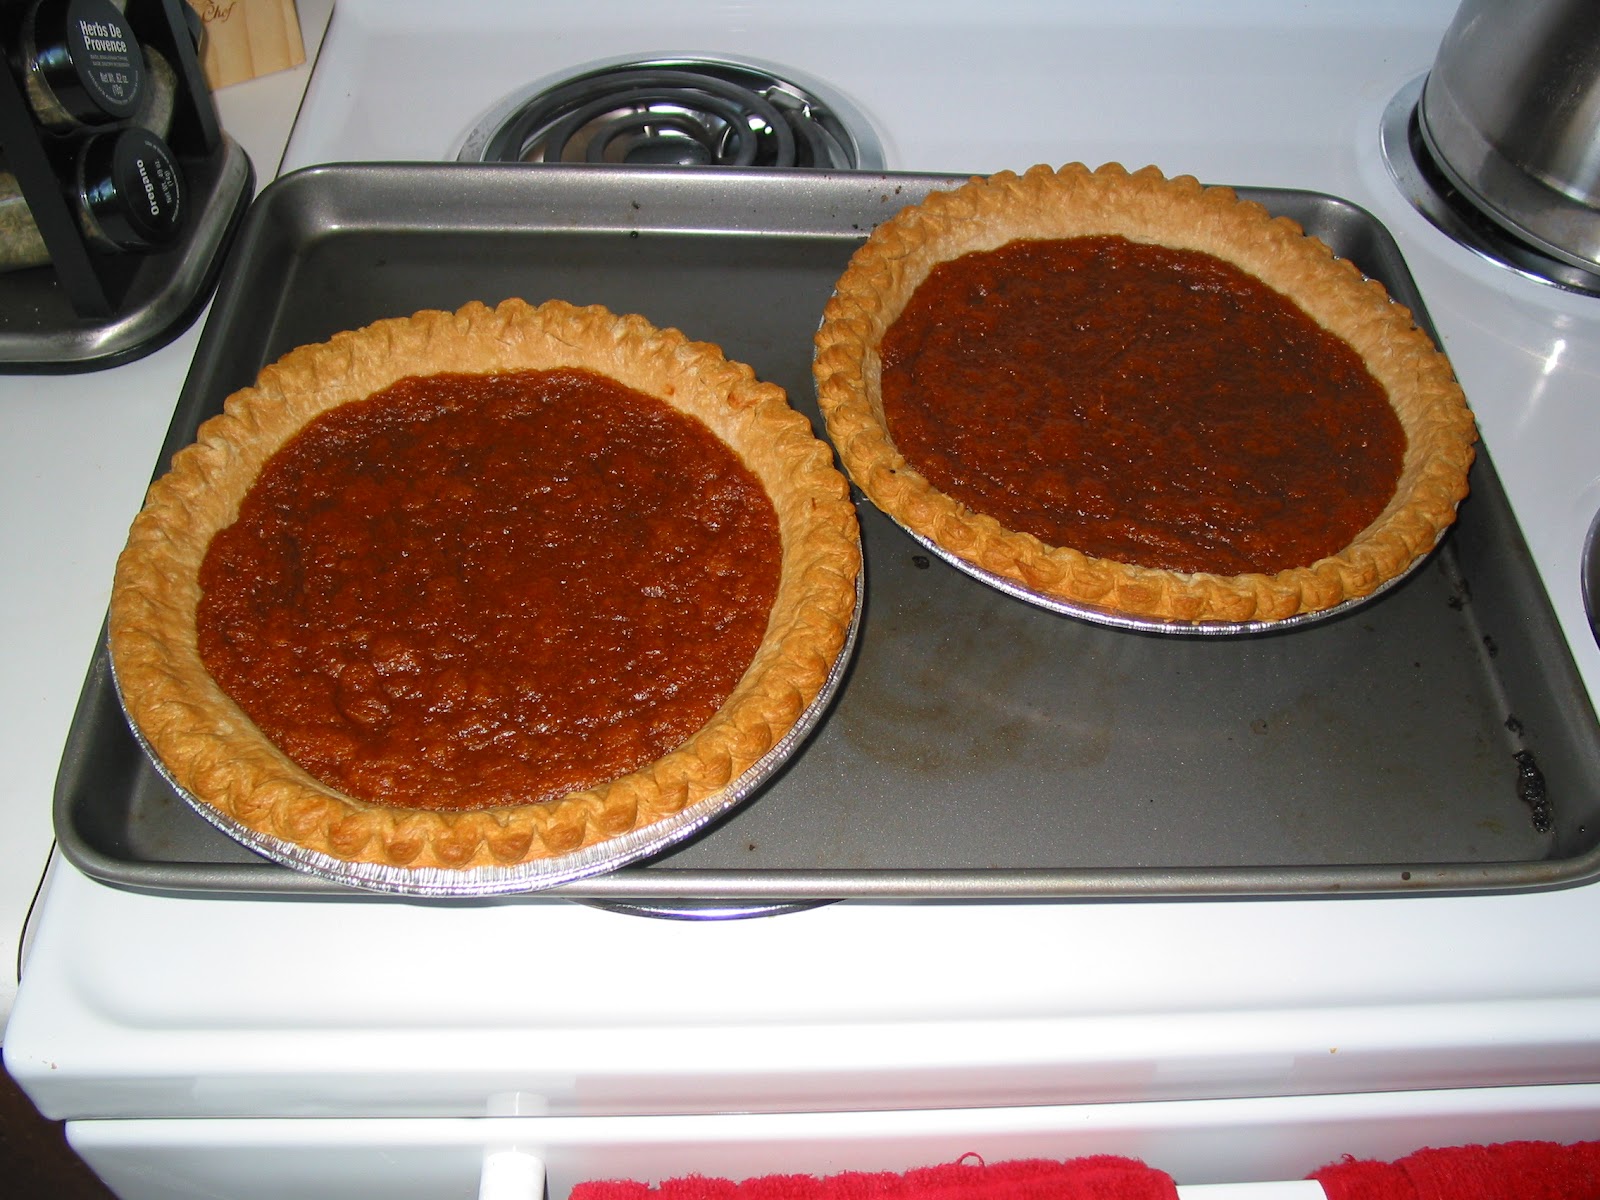
Pumpkin Pie

If you follow me on Twitter, you may have heard that I was thinking about making an apple pie today.  Unfortunately, I did not have all of the ingredients for apple pie, mainly apples, and I had no intention of going to the grocery store hours before the Super Bowl.  The lines would be huge!  It just so happens that I keep pumpkin and pie crusts in my kitchen just in case.

I don't happen to keep condensed milk, however, so it ended up being more like pumpkin jelly or sludge.  It tastes fine, though!


Yummy!  

(That was sarcasm, by the way.)  

One tip I offer is, if you put a cookie sheet under them to catch drippings, you should either place the cookie sheet on the rack underneath the one the pies are on, or you preheat the cookie sheet in the oven before you put the pies on it.  

I just realized I did two pumpkin things in a row.  

Sunday, January 30, 2011

Pumpkin Pasties!

Last week I mentioned that I would be cooking a tasty treat from the Unofficial Harry Potter Cookbook by Dinah Bucholz.  Pumpkin pasties are kind of like those fruit pies you buy at the gas station, but these are probably healthier and they taste a lot better.  Plus, they're MAGICAL!!!  Woo!

For pumpkin pasties you make a dough, like for a pie crust.  You have to refrigerate it for a couple of hours after making it so that it won't separate when you roll it out.


While the dough is cooling you should make the pumpkin filling with a big ol' can of pumpkin (not pumpkin pie filling) and put some spices in it (though I think, if you really wanted to, you could just use the pie filling).  When you roll the dough out, you cut out a bunch of circles, about 6 inches.  Put some of the filling on the circle, leaving an inch or so all around.


Fold the dough in half and smush the edges together with a fork.  Make a couple cuts in the top so it can vent.    Line them up on a cookie sheet and bake them until the edges are a little golden brown.


You can even put a little whipped cream on top, but I don't think that's entirely necessary.

Saturday, January 22, 2011

Goat Cheese and Broccoli Pizza From Baking by Martha Day

My kitchen is packed with sweets; leftovers of the peach cobbler, Boyfriend made an Italian upside-down apple cake when one of his friends came to dinner, and of course all the Christmas candy you can imagine.  I was craving something a little more savory while I was perusing my recipes, so I chose this pizza for a little change of pace.  It may sound weird but it was delicious, as well as very rich.

Kneading some dough...  

Rolling out the crust

Next time I would add more broccoli to help balance out the richness of the goat cheese.  When you're piling on all the fixins it looks like it will be too tall to be a reasonable pizza, but it settles down in volume while baking, so adding broccoli would be just fine.

Before baking

Tomato sauce, steamed broccoli florets, cherry tomatoes, black olives, goat cheese, parmesan, and mozzarella for good measure.  
Coming up next week....
I found a lovely book at Barnes & Noble today which I will be cooking from next week.  I wet my pants a little when I saw it.  I can't wait to look through it some more and pick a recipe out for the next week!

Picture found here

Friday, January 14, 2011

Mmmmm......Lasagna *Updated*

Lasagna has definitely been my favorite food ever since I was born.  I made one this week for a friend of Boyfriend's that came over for dinner from a family recipe that I'm not at liberty to reveal.  It was a beautiful lasagna, as usual, but instead of showing you a lasagna I can't tell you about, I thought I would give my perspective on the creation of one.

If you are not opposed to pork, I recommend mixing ground sausage in with your ground beef, it adds a certain yummy flavor.  I don't know how to describe it because I'm not a real cook, sorry!  Just more flavors than MEAT flavor. 

Mixing a little bit of spinach in with ricotta makes it healthier, but it's hard to taste the vegetable-ness of it if you've a picky eater on your hands. 

Using ricotta makes the lasagna a little more liquidy, so it doesn't hold it's layered rectangular shape as well as if you just use meat, shredded cheese and noodles.  I really like the ricotta though.

DON'T BE AFRAID TO USE MORE CHEESE.

If you do use chopped spinach, and you get it frozen, thaw it well beforehand and drain it, that will help the lasagna keep its shape as well.

You can build a lasagna and freeze it for a while before you put it in the oven, so you have something for later.

*Also, if you get a fresh block of mozzarella and shred or slice it yourself, that will also make the lasagna more watery, so cut the cheese beforehand to let it dry out a bit, or just use the pre-shredded stuff.

If I could devote my whole life to lasagnas, I would.  I want to know everything about them, and taste all the different kinds.  My favorite so far is from a restaurant in California that my family went to frequently when I was little.  The restaurant was in San Jose, it was called Gallo's.  I think it was family-owned, so of course it was good!  Does anybody else in the blogosphere know any good restaurants for lasagnas?  Or any other tips when making them?

Saturday, January 8, 2011

Peach Cobbler

This is by no means a good baked from scratch.  My mom got this recipe from one of those little Betty Crocker or Pillsbury cookbooks that are with the tabloid magazines by the register in grocery stores.  I've made it once with the recipe, but I didn't have the recipe this time, so I winged it.  This is what I did this time... 

Step one:  Preheat oven to 350 degrees F.
Two:  Melt a stick of butter.
3.  Stir the butter into a package of yellow cake mix.  (In a bowl, duh.) 
4.  Mix in a handful-ish of oats.
5.  In a glass baking dish empty two cans of peach pie filling and spread it over the whole pan evenly.
6.  Dump the cake/butter/oats mix over the peaches and spread it evenly over the top to cover the filling. 
7.  Slap it in the oven for about forty-five minutes, until top is golden brown.  Let it cool for a little bit before you eat it.

If you want to do this with fresh fruit, you just chop 'em up and mix the fruit with sugar and cinnamon before you put the cake mix on it.  I have done it this way before with apricots, I think?  It was good. 

I realize these are poor instructions.  What size cans of filling do you use?  What size pan?  I don't know.  You can't go wrong, there's almost no way you could mess this up.  You could put in more butter in the topping, I'm sure, make it a little more crumbly.  And just put in enough fruit to where you think you'd get enough from a scoop of cobbler.  This is where I prefer the fresh or frozen fruit, because sometimes the cans have more syrup than fruit. 

A hot cobbler is always good with a scoop of French vanilla ice cream! 

Saturday, December 25, 2010

An Oven Update

I called maintenance, and they came by on Friday to test the oven.  It turned out that runs over 50 degrees hotter than it is supposed to, so it needed a new thermostat.  The oven is 15-20 years old, however, and they don't make that model of thermostat anymore.  The end result?  Our landlord/property management company will be buying a new(er) oven for our unit.  So, for the second week in a row I do not have a baked good.  I'm not entirely sure if the oven situation will be fixed by the end of next week either (I'm heading out of town next Wednesday), but it should be by the week after.  See you in 2011! 

Sunday, December 19, 2010

What a Mess

As you may recall, my farmhouse biscuits were first turned to pancakes.  Boyfriend made some cookies last week, which were also turned to pancakes.  Today Boyfriend and I made some sugar cookies, and they, too, spread out to cover the whole cookie sheet.  A cheesecake that Boyfriend made today was burnt on the top after only a few minutes in the oven.  We have come to the conclusion that the thermostat in our oven is broken.  It gets way too hot for only being told to go to 350 degrees.  Thus, I have no baked good for this week.  :(  They were all crap.  Sorry. 

Thursday, December 9, 2010

Coolrise Yeast Baking Basic Bread Dough

This is a recipe I got from a cooking class in sixth or seventh grade.  I have no idea who made the recipe, and if it was my teacher, I can't remember her name.  :(  Sorry, teacher.  Anyhow, this bread was the second baked good prepared by a cobalt blue stand mixer given to boyfriend as an early Christmas present from his grandma.  I'll have to take a picture of the mixer sometime, it's quite a beauty! 

If you are using a stand mixer for your bread baking, the recipe and instruction guide has rules for how many cups of flour you should use for certain size mixers, which you should, of course, adhere to.  Most recipes for bread have a range of flour to use in the recipe, and you always start with only a couple cups of flour, adding more as you mix the ingredients.  Technically, speed 2 on a stand mixer counts as kneading, but I just mixed it enough to make it a solid-ish lump, then kneaded it myself (because that's the funnest part!). 

A word of advice: if you are kneading bread, do not plunge your fingers straight into the dough.  You will never get them back until you have dumped half a bag of flour onto them.  Although, my dough did not have enough flour in it, hence the glopishness, and adding flour made it manageable. 

After the kneading and the rising, I popped it in the oven for forty-five minutes, and it came out beautifully!  I have never seen, smelled, nor touched something so perfect in all my years.  We enjoyed it with a pot roast boyfriend made in the crock pot.  It was, and still is delicious.  And it was easy.  There are easy bread recipes out there.  I recommend giving it a try, I guarantee that you will have fun and feel good afterward. 

Wednesday, December 1, 2010

Farmhouse Biscuits from Baking by Martha Day

My very first baked good of the challenge was called Farmhouse Biscuits, and the main ingredients were peanut butter and something called muesli, which I had never heard of before this recipe.  It is apparently a mixture of different kinds of grains like wheat, rye and oats and sometimes there is dried fruit like raisins in it.  I found muesli cereal at Safeway with the Eat Right brand; it came in a box from the cereal aisle.  I wasn't sure that the corn-flake style of the cereal was quite right for the recipe, so I looked around the rest of the store but did not see anything similar in any way.  Maybe if I had more time to shop (or more money) then I would try looking somewhere like Whole Foods or Sunflower Market. 

Anyway, I come home with my muesli, preheat the oven, grease a baking sheet, look at the recipe to begin.  All the measurements are in ounces.  Uh-oh.  I'm not used to measuring in ounces, but I have a liquid measuring glass that measured in both ounces and cups (and maybe milliliters, too?), so I used that to get my bearings with the dry ingredient cups.  I thought I had it figured out, but halfway through I looked back at the glass.  It seems I had doubled the recipe on everything but the butter.  "That's alright," I told myself, "just double the rest of the recipe."  Unfortunately, I did not have another half cup of butter, so I ended up being about an eighth of a cup short.  This fiasco should have served as some foreshadowing for me, but I kept going.  After all, I was not about to waste a cup of peanut butter, amongst other ingredients. 

I tried to plug along with the rest of the recipe, making sure to double everything from now on.  I crunched the muesli cereal to break the flakes when I was measuring it so that they wouldn't look or taste weird later and so there was less air between chunks in order to get a better measurement.  I mixed everything for the last time before plopping mounds of it on the baking sheet.  I noticed mine looked a little goopier than the picture's, but I put it in the oven anyway.  I did not know what to expect, but I certainly was not expecting it to turn out well.

I checked on the first batch after about seven minutes (they are supposed to cook for about fifteen).  To my horror, they had all spread out as thin as crepes and the burnt edges were bubbling in protest.  I pulled the sheet out and stared at them, wondering what to do.  I grabbed a spoon and took a nibble out of the center of one of the "biscuits."  The taste was...okay.  The texture was not.  I carried the sheet to the garbage can and scooped them in there.  They wouldn't hurt anyone anymore.


To make my creation thicker (Panic!  "What happened?  Why did it do this?  What should I do?  What can I do?  What's going on?"), I added less than a quarter of a teaspoon baking powder, less than a quarter cup of flour, and a small handful more of the muesli.  I set these up on the sheet again, and this time they looked a little bit more like the picture from the book.  However, I  think the universe just had it out for me that day, because I checked the timer on the oven after a while, and it hadn't moved.  A little desensitized at that point, I pulled the sheet out of the oven.  The edges were slightly burnt, but the middles were a little gelatinous.  I let them cool on the sheet in hopes that they would set up a little better.

I came back to the biscuits a little later to find the middles had indeed solidified.  I scooped them off the sheet and onto a plate, which is when I discovered that the bottoms were much more burnt than I expected: they were completely black.  I tasted one.  It was better than the failures that came out earlier.  They were pretty dense, and felt heavy and full in my stomach.  I expect they are called "farmhouse" biscuits because they are really filling so you eat little and go a lot further, thus completing more work on the farm.  That, or because every ingredient on the farm gets dumped into this recipe.

My biscuits compared to the book's biscuits (top of page in tin)
I'd say this was a fairly interesting, if not comical, way to start out my challenge.  I definitely learned a lot.  Hopefully, the rest of my experiments turn out a little better than this one did, but I'm glad it happened.